为你的 Java Spring Boot 应用添加认证 (Authentication)
本指南将向你展示如何将 Logto 集成到你的 Java Spring Boot 应用中。
- 你可以在我们的 spring-boot-sample github 仓库中找到本指南的示例代码。
- 将 Logto 集成到你的 Java Spring Boot 应用中无需官方 SDK。我们将使用 Spring Security 和 Spring Security OAuth2 库来处理与 Logto 的 OIDC 认证 (Authentication) 流程。
前置条件
- 一个 Logto Cloud 账号或 自托管 Logto。
- 我们的示例代码是使用 Spring Boot 的 securing web starter 创建的。如果你还没有 Web 应用,请按照指引初始化一个新项目。
- 在本指南中,我们将使用 Spring Security 和 Spring Security OAuth2 库来处理与 Logto 的 OIDC 认证 (Authentication) 流程。请务必阅读官方文档以了解相关概念。
配置你的 Java Spring Boot 应用
添加依赖
对于 gradle 用户,在你的 build.gradle 文件中添加以下依赖:
dependencies {
  implementation 'org.springframework.boot:spring-boot-starter-thymeleaf'
	implementation 'org.springframework.boot:spring-boot-starter-web'
  implementation 'org.springframework.boot:spring-boot-starter-security'
	implementation 'org.springframework.boot:spring-boot-starter-oauth2-client'
}
对于 maven 用户,在你的 pom.xml 文件中添加以下依赖:
<dependency>
  <groupId>org.springframework.boot</groupId>
  <artifactId>spring-boot-starter-thymeleaf</artifactId>
</dependency>
<dependency>
  <groupId>org.springframework.boot</groupId>
  <artifactId>spring-boot-starter-web</artifactId>
</dependency>
<dependency>
  <groupId>org.springframework.boot</groupId>
  <artifactId>spring-boot-starter-security</artifactId>
</dependency>
<dependency>
  <groupId>org.springframework.boot</groupId>
  <artifactId>spring-boot-starter-oauth2-client</artifactId>
</dependency>
OAuth2 客户端配置
在 Logto 控制台注册一个新的 Java Spring Boot 应用,并获取你的 Web 应用所需的客户端凭证和 IdP 配置。
将以下配置添加到你的 application.properties 文件中:
spring.security.oauth2.client.registration.logto.client-name=logto
spring.security.oauth2.client.registration.logto.client-id={{YOUR_CLIENT_ID}}
spring.security.oauth2.client.registration.logto.client-secret={{YOUR_CLIENT_ID}}
spring.security.oauth2.client.registration.logto.redirect-uri={baseUrl}/login/oauth2/code/{registrationId}
spring.security.oauth2.client.registration.logto.authorization-grant-type=authorization_code
spring.security.oauth2.client.registration.logto.scope=openid,profile,offline_access
spring.security.oauth2.client.registration.logto.provider=logto

spring.security.oauth2.client.provider.logto.issuer-uri={{LOGTO_ENDPOINT}}/oidc
spring.security.oauth2.client.provider.logto.authorization-uri={{LOGTO_ENDPOINT}}/oidc/auth
spring.security.oauth2.client.provider.logto.jwk-set-uri={{LOGTO_ENDPOINT}}/oidc/jwks
实现
在我们深入细节之前,下面是终端用户体验的快速概览。登录流程可以简化为如下:
- 你的应用调用登录方法。
- 用户被重定向到 Logto 登录页面。对于原生应用,会打开系统浏览器。
- 用户完成登录后被重定向回你的应用(配置为重定向 URI)。
关于基于重定向的登录
- 此认证 (Authentication) 过程遵循 OpenID Connect (OIDC) 协议,Logto 强制执行严格的安全措施以保护用户登录。
- 如果你有多个应用程序,可以使用相同的身份提供商 (IdP)(日志 (Logto))。一旦用户登录到一个应用程序,当用户访问另一个应用程序时,Logto 将自动完成登录过程。
要了解有关基于重定向的登录的原理和好处的更多信息,请参阅 Logto 登录体验解释。
为了在用户登录后将其重定向回你的应用,你需要在上一步中通过 client.registration.logto.redirect-uri 属性设置重定向 URI。
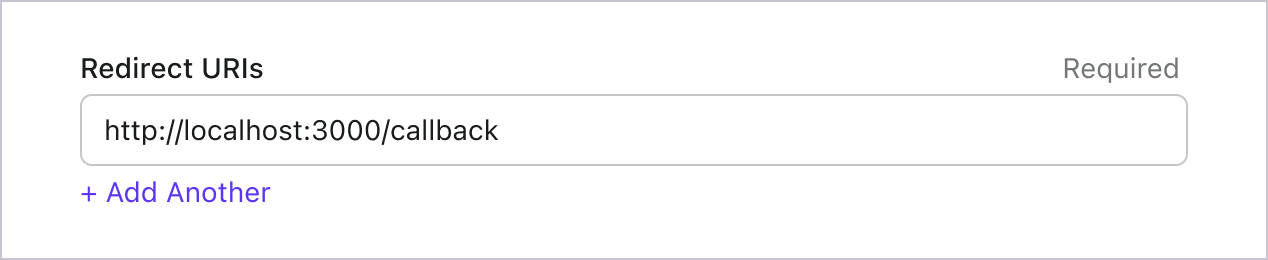
配置重定向 URI
切换到 Logto Console 的应用详情页面。添加一个重定向 URI http://localhost:8080/login/oauth2/code/logto。
就像登录一样,用户应该被重定向到 Logto 以注销共享会话。完成后,最好将用户重定向回你的网站。例如,添加 http://localhost:3000/ 作为注销后重定向 URI 部分。
然后点击“保存”以保存更改。
实现 WebSecurityConfig
在你的项目中新建 WebSecurityConfig 类
WebSecurityConfig 类用于配置你的应用安全设置。它是处理认证 (Authentication) 和授权 (Authorization) 流程的关键类。更多细节请查阅 Spring Security 文档。
package com.example.securingweb;

import org.springframework.context.annotation.Configuration;
import org.springframework.security.config.annotation.web.configuration.EnableWebSecurity;

@Configuration
@EnableWebSecurity

public class WebSecurityConfig {
 // ...
}
创建一个 idTokenDecoderFactory bean
由于 Logto 默认使用 ES384 算法,我们需要重写默认的 OidcIdTokenDecoderFactory 以使用相同算法。
import org.springframework.context.annotation.Bean;
import org.springframework.security.oauth2.client.oidc.authentication.OidcIdTokenDecoderFactory;
import org.springframework.security.oauth2.client.registration.ClientRegistration;
import org.springframework.security.oauth2.jose.jws.SignatureAlgorithm;
import org.springframework.security.oauth2.jwt.JwtDecoderFactory;

public class WebSecurityConfig {
  // ...

  @Bean
  public JwtDecoderFactory<ClientRegistration> idTokenDecoderFactory() {
    OidcIdTokenDecoderFactory idTokenDecoderFactory = new OidcIdTokenDecoderFactory();
    idTokenDecoderFactory.setJwsAlgorithmResolver(clientRegistration -> SignatureAlgorithm.ES384);
    return idTokenDecoderFactory;
  }
}
创建 LoginSuccessHandler 类以处理登录成功事件
我们将在登录成功后将用户重定向到 /user 页面。
package com.example.securingweb;

import java.io.IOException;

import org.springframework.security.core.Authentication;
import org.springframework.security.web.authentication.AuthenticationSuccessHandler;

import jakarta.servlet.ServletException;
import jakarta.servlet.http.HttpServletRequest;
import jakarta.servlet.http.HttpServletResponse;

public class CustomSuccessHandler implements AuthenticationSuccessHandler {
  @Override
  public void onAuthenticationSuccess(HttpServletRequest request, HttpServletResponse response,
      Authentication authentication) throws IOException, ServletException {
    response.sendRedirect("/user");
  }
}
创建 LogoutSuccessHandler 类以处理登出成功事件
清除会话并将用户重定向到首页。
package com.example.securingweb;

import java.io.IOException;

import org.springframework.security.core.Authentication;
import org.springframework.security.web.authentication.logout.LogoutSuccessHandler;

import jakarta.servlet.ServletException;
import jakarta.servlet.http.HttpServletRequest;
import jakarta.servlet.http.HttpServletResponse;
import jakarta.servlet.http.HttpSession;

public class CustomLogoutHandler implements LogoutSuccessHandler {
  @Override
  public void onLogoutSuccess(HttpServletRequest request, HttpServletResponse response, Authentication authentication)
      throws IOException, ServletException {
    HttpSession session = request.getSession();

    if (session != null) {
      session.invalidate();
    }

    response.sendRedirect("/home");
  }
}
在 WebSecurityConfig 类中添加 securityFilterChain
securityFilterChain 是负责处理传入请求和响应的过滤器链。
我们将配置 securityFilterChain,允许访问首页,其他请求都需要认证 (Authentication)。使用 CustomSuccessHandler 和 CustomLogoutHandler 处理登录和登出事件。
import org.springframework.context.annotation.Bean;
import org.springframework.security.config.annotation.web.builders.HttpSecurity;
import org.springframework.security.web.DefaultSecurityFilterChain;

public class WebSecurityConfig {
  // ...

  @Bean
  public DefaultSecurityFilterChain securityFilterChain(HttpSecurity http) throws Exception {
    http
      .authorizeRequests(authorizeRequests ->
        authorizeRequests
          .antMatchers("/", "/home").permitAll() // 允许访问首页
          .anyRequest().authenticated() // 其他请求需要认证 (Authentication)
      )
      .oauth2Login(oauth2Login ->
        oauth2Login
          .successHandler(new CustomSuccessHandler())
      )
      .logout(logout ->
        logout
          .logoutSuccessHandler(new CustomLogoutHandler())
      );
    return http.build();
  }
}
创建首页
(如果你的项目已有首页可跳过此步骤)
package com.example.securingweb;

import java.security.Principal;

import org.springframework.stereotype.Controller;
import org.springframework.web.bind.annotation.GetMapping;

@Controller
public class HomeController {
  @GetMapping({ "/", "/home" })
  public String home(Principal principal) {
    return principal != null ? "redirect:/user" : "home";
  }
}
该控制器会在用户已认证 (Authentication) 时重定向到用户页面,否则显示首页。请在首页添加登录链接。
<body>
  <h1>Welcome!</h1>

  <p><a th:href="@{/oauth2/authorization/logto}">使用 Logto 登录</a></p>
</body>
创建用户页面
新建控制器处理用户页面:
package com.example.securingweb;

import java.security.Principal;
import java.util.Map;

import org.springframework.security.oauth2.client.authentication.OAuth2AuthenticationToken;
import org.springframework.security.oauth2.core.user.OAuth2User;
import org.springframework.stereotype.Controller;
import org.springframework.ui.Model;
import org.springframework.web.bind.annotation.GetMapping;
import org.springframework.web.bind.annotation.RequestMapping;

@Controller
@RequestMapping("/user")
public class UserController {

  @GetMapping
  public String user(Model model, Principal principal) {
    if (principal instanceof OAuth2AuthenticationToken) {
      OAuth2AuthenticationToken token = (OAuth2AuthenticationToken) principal;
      OAuth2User oauth2User = token.getPrincipal();
      Map<String, Object> attributes = oauth2User.getAttributes();

      model.addAttribute("username", attributes.get("username"));
      model.addAttribute("email", attributes.get("email"));
      model.addAttribute("sub", attributes.get("sub"));
    }

    return "user";
  }
}
用户认证 (Authentication) 后,我们将从认证 (Authentication) 的 principal 对象中获取 OAuth2User 数据。更多细节请参考 OAuth2AuthenticationToken 和 OAuth2User。
读取用户数据并传递给 user.html 模板。
<body>
  <h1>用户详情</h1>
  <div>
    <p>
    <div><strong>name:</strong> <span th:text="${username}"></span></div>
    <div><strong>email:</strong> <span th:text="${email}"></span></div>
    <div><strong>id:</strong> <span th:text="${sub}"></span></div>
    </p>
  </div>

  <form th:action="@{/logout}" method="post">
    <input type="submit" value="登出" />
  </form>
</body>
请求额外声明 (Claims)
你可能会发现从 principal (OAuth2AuthenticationToken) 返回的对象中缺少一些用户信息。这是因为 OAuth 2.0 和 OpenID Connect (OIDC) 的设计遵循最小权限原则 (PoLP),而 Logto 是基于这些标准构建的。
默认情况下,返回的声明(Claim)是有限的。如果你需要更多信息,可以请求额外的权限(Scope)以访问更多的声明(Claim)。
“声明(Claim)”是关于主体的断言;“权限(Scope)”是一组声明。在当前情况下,声明是关于用户的一条信息。
以下是权限(Scope)与声明(Claim)关系的非规范性示例:
“sub” 声明(Claim)表示“主体(Subject)”,即用户的唯一标识符(例如用户 ID)。
Logto SDK 将始终请求三个权限(Scope):openid、profile 和 offline_access。
如需获取更多用户信息,你可以在 application.properties 文件中添加额外的权限 (Scopes)。例如,若要请求 email、phone 和 urn:logto:scope:organizations 权限 (Scope),请在 application.properties 文件中添加如下内容:
spring.security.oauth2.client.registration.logto.scope=openid,profile,offline_access,email,phone,urn:logto:scope:organizations
然后你可以在 OAuth2User 对象中访问这些额外的声明 (Claims)。
运行并测试应用
运行应用并访问 http://localhost:8080。
- 你会看到带有登录链接的首页。
- 点击链接使用 Logto 登录。
- 认证 (Authentication) 成功后,你会被重定向到用户页面并显示你的用户信息。
- 点击登出按钮退出登录,你会被重定向回首页。
权限 (Scopes) 与声明 (Claims)
Logto 使用 OIDC 权限和声明约定 来定义从 ID 令牌和 OIDC 用户信息端点 检索用户信息的权限和声明。“权限”和“声明”都是 OAuth 2.0 和 OpenID Connect (OIDC) 规范中的术语。
简而言之,当你请求一个权限时,你将获得用户信息中的相应声明。例如,如果你请求 email 权限,你将获得用户的 email 和 email_verified 数据。
以下是支持的权限 (Scopes) 列表及相应的声明 (Claims):
openid
| 声明名称 | 类型 | 描述 | 需要用户信息吗? |
|---|---|---|---|
| sub | string | 用户的唯一标识符 | 否 |
profile
| 声明名称 | 类型 | 描述 | 需要用户信息吗? |
|---|---|---|---|
| name | string | 用户的全名 | 否 |
| username | string | 用户名 | 否 |
| picture | string | 终端用户的个人资料图片的 URL。此 URL 必须指向一个图像文件(例如 PNG、JPEG 或 GIF 图像文件),而不是包含图像的网页。请注意,此 URL 应特别引用适合在描述终端用户时显示的终端用户的个人资料照片,而不是终端用户拍摄的任意照片。 | 否 |
| created_at | number | 终端用户创建的时间。时间表示为自 Unix 纪元(1970-01-01T00:00:00Z)以来的毫秒数。 | 否 |
| updated_at | number | 终端用户信息最后更新的时间。时间表示为自 Unix 纪元(1970-01-01T00:00:00Z)以来的毫秒数。 | 否 |
其他 标准声明 包括 family_name、given_name、middle_name、nickname、preferred_username、profile、website、gender、birthdate、zoneinfo 和 locale 也将包含在 profile 权限中,无需请求用户信息端点。与上述声明的区别在于,这些声明只有在其值不为空时才会返回,而上述声明在值为空时将返回 null。
与标准声明不同,created_at 和 updated_at 声明使用毫秒而不是秒。
email
| 声明名称 | 类型 | 描述 | 需要用户信息吗? |
|---|---|---|---|
string | 用户的电子邮件地址 | 否 | |
| email_verified | boolean | 电子邮件地址是否已验证 | 否 |
phone
| 声明名称 | 类型 | 描述 | 需要用户信息吗? |
|---|---|---|---|
| phone_number | string | 用户的电话号码 | 否 |
| phone_number_verified | boolean | 电话号码是否已验证 | 否 |
address
有关地址声明的详细信息,请参阅 OpenID Connect Core 1.0。
custom_data
| 声明名称 | 类型 | 描述 | 需要用户信息吗? |
|---|---|---|---|
| custom_data | object | 用户的自定义数据 | 是 |
identities
| 声明名称 | 类型 | 描述 | 需要用户信息吗? |
|---|---|---|---|
| identities | object | 用户的关联身份 | 是 |
| sso_identities | array | 用户的关联 SSO 身份 | 是 |
roles
| 声明名称 | 类型 | 描述 | 需要用户信息吗? |
|---|---|---|---|
| roles | string[] | 用户的角色 | 否 |
urn:logto:scope:organizations
| 声明名称 | 类型 | 描述 | 需要用户信息吗? |
|---|---|---|---|
| organizations | string[] | 用户所属的组织 ID | 否 |
| organization_data | object[] | 用户所属的组织数据 | 是 |
urn:logto:scope:organization_roles
| 声明名称 | 类型 | 描述 | 需要用户信息吗? |
|---|---|---|---|
| organization_roles | string[] | 用户所属的组织角色,格式为 <organization_id>:<role_name> | 否 |
考虑到性能和数据大小,如果“需要用户信息吗?”为“是”,则表示声明不会显示在 ID 令牌中,而会在 用户信息端点 响应中返回。
在 application.properties 文件中添加额外的权限和声明,以请求更多的用户信息。例如,要请求 urn:logto:scope:organizations 权限,请在 application.properties 文件中添加以下行:
spring.security.oauth2.client.registration.logto.scope=openid,profile,offline_access,urn:logto:scope:organizations
用户组织声明将包含在授权令牌中。